Drawing & Painting blog
SOME TIPS FOR DRAWING DOG PORTRAITS
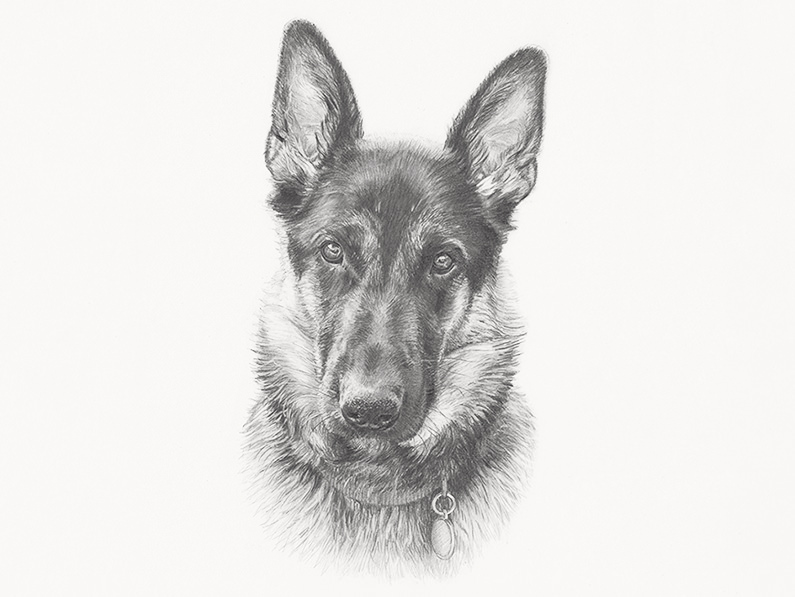
In my experience, drawing animals presents a similar challenge to sketching human hair. You can’t draw every individual hair, so how do you find a way to abbreviate them and instead convey an impression of the texture? Animal fur presents the additional difficulty that you need to distinguish between the colour of the fur – which may be quite multicoloured – and the different tones created by the way light is falling on it. Fur can be very shiny, and will reflect a range of extreme highlights and dark shadows.
Below I’m going to show you three stages of a drawing of a very sleek and shiny dog called Sebastian, drawn from a photo.
First stage
I think of this first layer as my ‘orientation’ layer, where I find my way around the shapes and locate blocks of lights, darks and mid-tones.
The first step here was to scrutinise my reference photo and to visualise what sort of general shape the dog’s head created. I’ve marked the shape in blue so you can see how I tried to picture it. I then very lightly sketched the shape onto my paper to help guide me, before drawing in the features of the dog’s face and his ears within in.
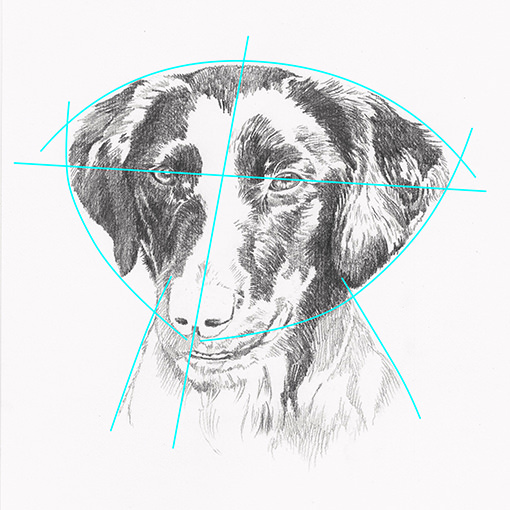
I also analysed the angle of the head by imagining a vertical line running between the eyes and down through the nose, and a horizontal line running through the eyes. I drew this onto the paper too, to help me find the location of the eyes and the nose.
Next I tried to locate all the shapes within the dog’s fur, formed by different tones. Some of these tonal variations were due to different colours within the fur, and others were created by highlights and shadows falling on it. At his point I was looking quite broadly at general areas of lights and darks and trying not to get caught up in small details, which I could come back at a later point. Squinting at my reference photo helped me to focus on the overall tones and to ignore those smaller variations.
When I hatch my shading I always follow my golden rule, which is that I always shade in the same direction as the fur so that my lines can stand for individual hairs. By following the fur’s direction I can show the way that the dog’s skin hangs over the muscles, suggesting the its anatomy underneath and revealing its tensed energy.
Second stage
In this next stage, I drew in some hairs within the lighter areas of the fur. I then took a piece of facial tissue and smoothed down all the graphite a bit. The effect I always try to achieve is of a base of smooth tones, but with still-visible hatched lines which will stand for individual hairs.
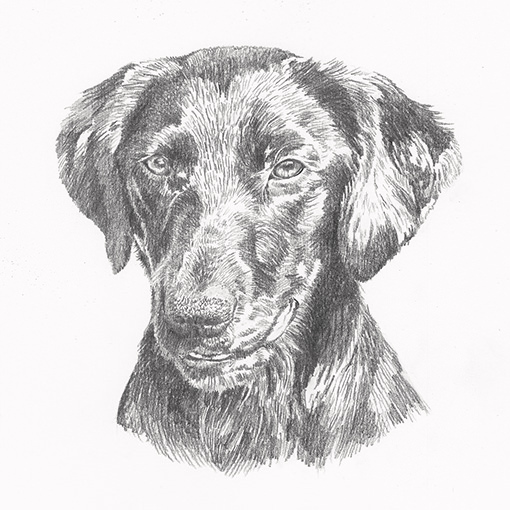
I never use my fingers to rub the pencil shading smooth because fingertips contain natural oils which can cause smudges on your paper if they mix with graphite dust.
To smooth your pencil you can buy a special ‘blending stump’ in an art store which is a tightly rolled paper stick designed for blending pencil or charcoal – however I find that tissue works fine for me! I only rub my shading lightly, so that the grain of the paper is still visible in the form of white flecks which show through the graphite. This stops the tones from becoming dull.
Final stage
In the final stage I added more shading to darken the tone of the fur, smoothed it down again, and then added a final layer of fine hairs on top. The more layering I worked in, the sleeker the dog started to look.
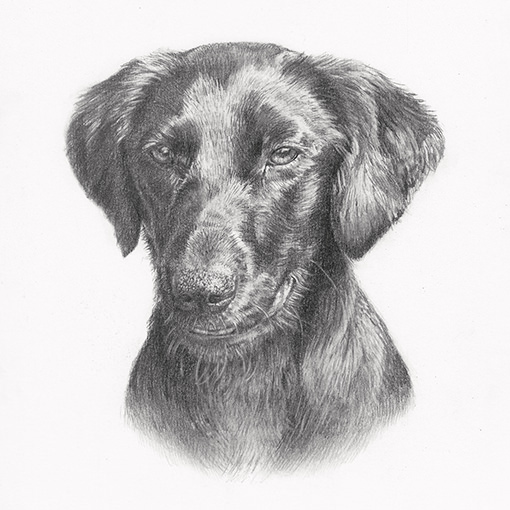
I also looked at the really small variations of tone and colour all over the dog’s fur. Sometimes this meant adding more shading in places, sometimes lightening small areas with a soft putty eraser. Putty erasers are very useful as they are mouldable and can be shaped to a fine point to lift off some of the graphite in small and specific areas, where you want to introduce little highlights.
Erasers are not just useful for correcting mistakes! I draw and layer with them almost as much as with my pencils when creating a pet portrait. In this drawing I also used my battery-powered electric eraser to cut in the brightest highlights including some naturally white hairs above the dog’s eyes and within his ears. I also used it to draw his whiskers.
A battery eraser is really powerful and can erase through very dark pencil shading, and this allows you to add your highlights at the end rather than trying to leave tiny bits of blanks paper to represent those bright spots. You can buy battery erasers in art stores which come with 5mm (1/4”) wide eraser tips, but I use one that I purchased online which has a 2.5mm (1/8”) attachment. This smaller eraser is really precise and great for doing whiskers and any really fine hairs.
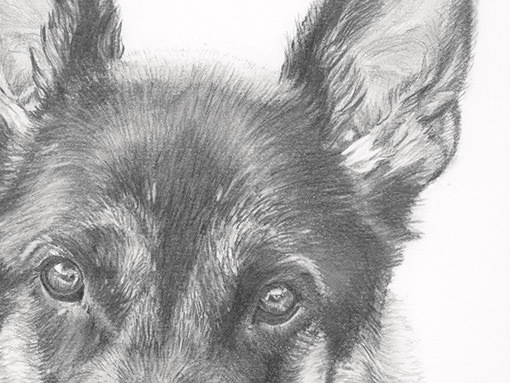
In this closeup from the drawing of Rocky from the top of the article, you can see where I’ve used the battery eraser to pick out both bright highlights reflected in and around his eyes, and also some naturally white hairs over the eyes and in the ears.
CATEGORIES
DRAWING PEOPLE
DRAWING ANIMALS
DRAWING MATERIALS
OIL PAINTING
WATERCOLOUR
PAINTING MATERIALS
FRAMING

