A guide to framing & conserving a drawing
I don’t offer framing for my portraits, but I hope you will find some of this advice on framing a drawing, watercolour or giclée print useful. The advice on this page also covers framing a pastel, or any artwork made on paper. For information on framing an oil painting, click here
FRAMING A DRAWING:
Where to get your artwork framed
I would always advocate going to a specialist framing shop which will usually offer excellent advice on what type of frame or mount will compliment your artwork. These days it’s easy to buy a frame off-the-shelf in a shop or to order a standard sized or bespoke frame online. The problem with this is that they aren’t likely to be made with conservation grade materials and may cause damage to your artwork in a matter of just a few years.
Some online framing companies won’t tell you what type of wood your frame is made from, or whether your mount has been treated to remove acid. They may only supply frames with static-attracting acrylic glazing rather than real glass, which is expensive to ship safely. In contrast an experienced framer who you can speak to in person will have many more options to offer. Here I’m going to explain all of the choices you may be presented with.
If you have a smartphone, take a photo of the room in which you are going to hang your artwork when you visit a framer. This will help them to suggest a frame and mount in a style and colour that will compliment décor.
The importance of the glass and the mount (mat)
Any drawing, painting or print made on paper is obviously very delicate and should always be framed behind glass to protect it. Unlike works on canvas made in oil or acrylic paint (both of which dry to a hard film and can be varnished) a paper surface is easily damaged and so whilst glazing may be omitted when framing oils or acrylics, it is considered essential for drawings and watercolours. Moreover any artwork in colour made with watercolours, chalks, pastels or coloured pencils is more vulnerable to fading than works made in oil or acrylic. This is why in museums works on paper are always protected behind UV-deflecting glass.
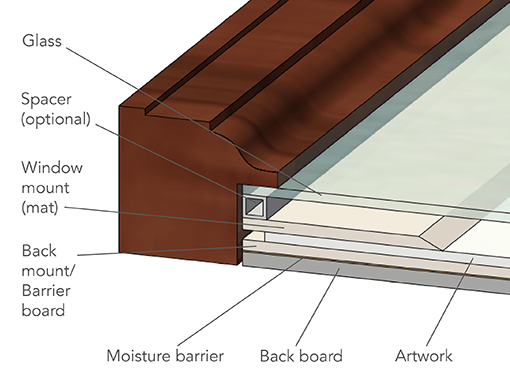
However if this glass were to be in direct contact with the artwork then it might smear any loose graphite or charcoal, whilst moisture condensing on the glass would be absorbed by the paper and could cause mildew to grow. Therefore a drawing should also be framed with a mount, which is a piece of thin card with an aperture cut in it (usually on an angled bevel) to reveal the artwork. This sits behind the glass and creates a vital gap between glass and drawing so that air can circulate and the paper can ‘breathe’.
CHOOSING A MOUNT (MAT)
A mount is sometimes known by the French term passepartout. In North America it’s called a mat, and the process of mounting a drawing is called matting. As well as its conservational role a mount adds a bit of size to the artwork which is generally desirable since drawings and watercolours tend to be smaller than oil or acrylic paintings. However you really want to frame your drawing without a mount (this is known as a ‘close framed’ picture) it’s important to ask your framer to add a spacer to maintain a gap and keep your drawing separated from the glass.
Below is an example of the results of poor air circulation in an incorrectly framed drawing. ‘Foxing’ is the name given to those familiar reddish brown stains that are often seen on old paper. They are caused either from natural iron within the paper or from fungal spores, both of which naturally exist within the paper. However the damper the paper becomes (and the more acidic the paper) the more likely that the iron or spores will trigger foxing marks to grow on it.
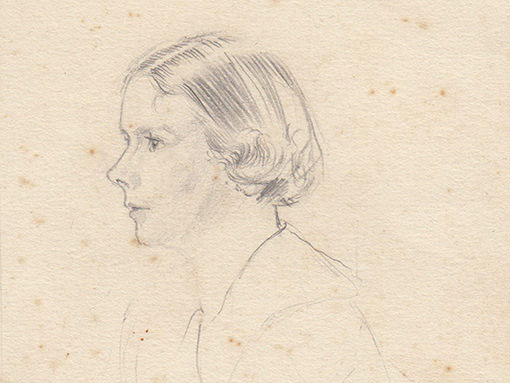
Although foxing is common in old artworks like this one, it can also occur surprisingly quickly in a new work kept in damp conditions. By ensuring a gap between drawing and glass and keeping your artwork in a dry environment, you can minimise the likelihood of foxing ruining your drawing.
How the mount is assembled
Your framer should sandwich your artwork between the window mount (this is the one with the aperture) and a back mount (or barrier board) before adding the back board behind that holds the mount in place. To protect the work from potential damp damage reaching it through the back board, a good framer will add a waterproof sheet of polyester or aluminium foil between back mount and back board as a moisture barrier. Be aware that even a cold external wall can cause mildew in a backing board, so requesting some sort of moisture barrier is a really good idea. You could also make one yourself using kitchen foil.
The importance of using a conservation grade mount
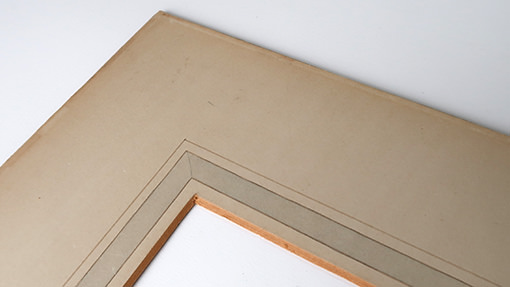
Cheap, ‘budget’ mounts are made from acidic wood pulp. This acid will quickly discolour a mount and turn the core to an unattractive brown/yellow colour where the edge is cut around the aperture, and it may also leach from the mount into the drawing or painting itself causing brown stains known as ‘mat burn’. When acid is absorbed from the mount into the drawing paper (known as ‘acid migration’ or ‘acid transfer’) this also increases the likelihood of foxing developing. Below you can see an old window mount whose core has been badly discoloured by acid. The paper that the board is faced with has also yellowed.
Ideally the ‘facing’ and ‘backing’ papers which are applied to the mountboard core should also have their acid neutralised. A good mount will be further treated with a bath of calcium carbonate to create an ‘alkali reserve’. This raises the pH of the board above neutral, to protect it against future acid absorption from the atmosphere or from contact with acidic materials.
Note that a mount that simply calls itself ‘acid-neutral’ is not the same as one that is truly acid-free. This type of cheaper mount may simply have been given an alkaline bath, but not properly bleached to remove its lignins.
The ‘back mount’ which the artwork is fixed to with little paper corners or acid-free tape should also be lignin-free. This is sometimes known as a ‘barrier board’ because it protects the drawing from absorbing acid from the back board, which is likely to be made from untreated hardboard (in ‘museum’ framing the back board used would be acid free too)
Here is a list of the different types of mount that you may be offered. Whatever the colour of the facing paper or its texture (more commonly smooth, but textured mounts are also available) At the very least I’d suggest requesting at least a ‘whitecore’ board which tells you that the core of the mount has been bleached of acid. However ‘conservation’ whitecore is really the best option.
CREAMCORE BOARD (budget):
This is the cheapest type of mount, made from wood that has been mechanically pulped but not chemically broken down and bleached. The core is not always cream in colour to begin with, but will certainly turn a browny colour within a year or two.
WHITECORE BOARD (not fully conservation grade):
Whitecore boards are made from bleached, lignin free wood pulp and their core should remain white. However whitecore boards are not considered conservation grade because they are still faced and backed with acid-containing papers.
As whitecore boards you can also buy blackcore, if you prefer the bevelled edge of the aperture to be black. However it is hard to find properly treated blackcore boards.
CONSERVATION WHITECORE (best choice for domestic framing):
These will be made from lignin-free wood pulp and acid-neutralised facing and backing papers, and hopefully also given an alkali reserve. A good conservation whitecore mount should be perfectly adequate for framing a domestic picture, although it’s still important to protect them by not hanging them in direct sunlight.
COTTONCORE/MUSEUMCORE:
The most expensive type of mount, this may not be available from a high street framer. It is made from cotton fibres and faced with cotton facing and backing papers. Cotton naturally contains no lignins and is therefore considered to be the highest archival quality. Cottoncore/Museumcore boards will usually have been given an alkali reserve, unless they are intended for framing photographs whose surface can be degraded by an alkaline mount.
The standard mountboard thickness in the UK is 1400 microns , which is 1.4mm thick. Avoid anything thinner, because 1400 microns is considered the minimum conservation standard. 1650 (1.65mm) micron board is considered minimum museum quality, although boards up to 3500 microns (3.5mm) are also sometimes available.
If you visit a museum or art gallery however you’ll notice that their mounts are often deeper even than this, in order to create the maximum breathing space for the artwork. The depth is achieved by sandwiching and bevelling two or three boards together. You can achieve the same depth either by requesting your framer to make a deeper mount with two boards glued together, by using a spacer, or by stacking or ‘stepping’ two or more boards, so that the edges of both are visible. Next we’ll look at some of these stylistic options.
MOUNT STYLES
Before discussing the many varied and sometimes rather elaborate mount effects available, I should say that there is nothing wrong at all with a simple, single layer white mount! It can look very artistic and modern when paired with a simple flat timber or gilt frame, which is my personal preference when framing a portrait. However when you visit a framers you may be offered a variety of more fancy mount and frame styles, so I will describe the most popular options you’re likely to find offered.
Different aperture shapes
These days framers use computerised cutters and you can get a frame cut in any shape you want including an oval (traditionally very popular for portraits), or a rectangle or square with rounded or stepped corners.
Stepping
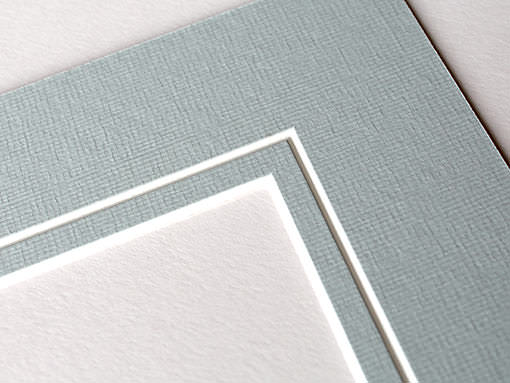
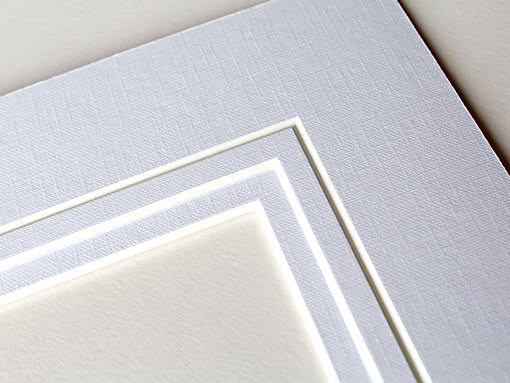
Stepped mounts feature two or more layered boards, one with an aperture cut wider than the other so that both are visible. These may be referred to as ‘double mounts’, or ‘triple mounts’ if using three layers. Using stepped edges creates a bit of extra visual interest, especially using plain white or cream boards. Layering coloured boards also creates a nice effect because it gives you a border created by the exposed white core of the upper board.
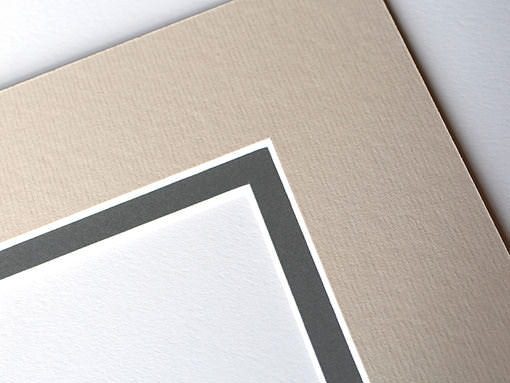
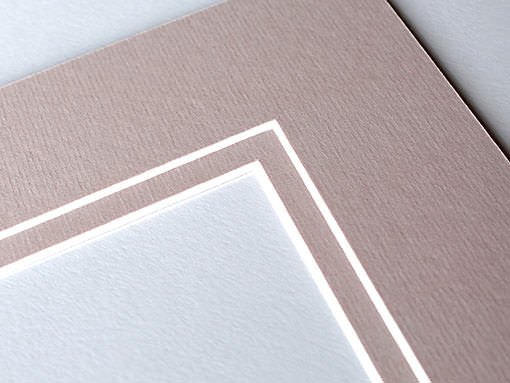
Instead of stepping two identically coloured boards you can use different colours that compliment each other, such as two shades of blue. To create an impression of a strong border around the aperture you could use a light colour like a white or cream layered over a dark one in a mid to dark grey, or a smart black.
‘V groove’ bevelling
This is a popular effect which most framers will offer. It’s created with a routing tool which cuts a ‘v’ shaped channel around the aperture of the mount, typically set back from the opening by around 1cm / 1/2 inch. The V groove is often combined with some stepped layering, with the groove running around the aperture on the top mount. Sometimes a double V groove may be used.
Slip mouldings
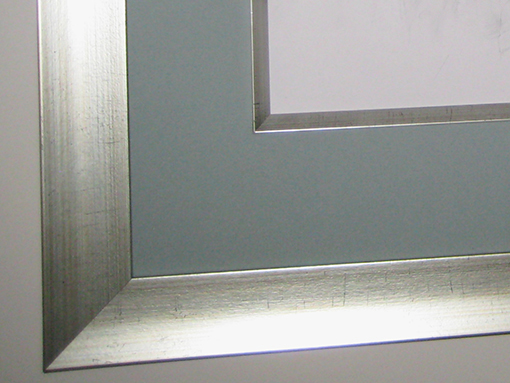
Sometimes a deep mount will be given a decorative edging called a ‘slip’. A mount finished this way is called a ‘slip mount’. A slip is made from a piece of timber or plastic, covered with gold or silver gilding or painted black. It may be in the form of a small decorative moulding, or a simple angled edging piece that faces the sides of the aperture. A slip can look particularly smart when it echoes the same colour as the main frame, as in the picture below.
MOUNT COLOURS
Off-white and cream mounts are a very popular choice as they are completely neutral, and can go with any room décor. However for a monochrome pencil drawing you could also choose any colour for your mount that complimenets the room’s colour scheme. Subtle and fairly neutral grey-blue mounts, heather, dove grey, deep grey and navy are all colours I’ve seen used very successfully. When framing a watercolour painting or a coloured pencil or pastel drawing it’s more difficult to match a coloured mount nicely and I’d probably advise playing it safe with a white or cream.
If you choose a pale coloured mount to frame a drawing made on white or cream paper, ensure there is enough contrast between the two. A drawing made on ice-white paper won’t pair well with an ice-white mount, but a cream will enhance it. If your drawing is on cream coloured or off-white paper then an ice-white will compliment it.
If you decide on a coloured mount, make sure to ask the framer about its ‘blue wool scale’ or ‘BWS’ rating. This scale tells you how quickly the colour of your mount may fade and runs from 0 (highly fugitive, which will fade quickly) to 8 (supposedly completely lightfast) . The lightfastness rating given to a mount will vary not only between brands but also between various colours, depending on the pigments used to colour the facing paper. A board should score at least a 3 on the blue wool scale, although 5+ is the minimum for museumcore boards. Less than this will mean that your mount will eventually fade and will need replacing after a number of years.
THE SIZE OF THE MOUNT
Generally a professional framer will have a good eye for the right visual balance between the widths of the frame and mount and the size of the artwork, and should help you by suggesting a suitable width for your mount.
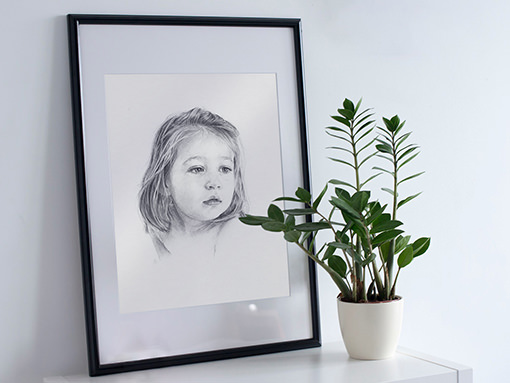
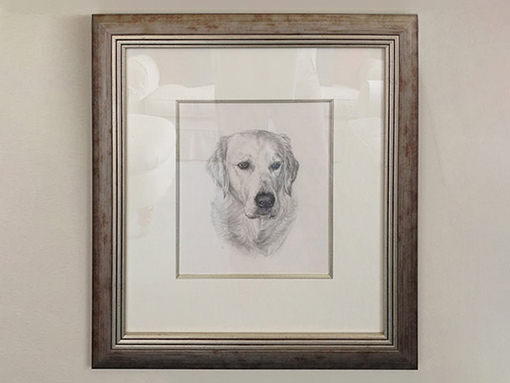
A standard minimum width is considered to be about 5cm / 2.5 inches all the way around. Most commonly the mount will be the same width all the way around, but you can also choose to have a greater width at top and bottom or on the sides – an example is the framed portrait at the top of this article. If you have a regular width mount around all sides of your image, many framers will allow a little bit extra width on the bottom which is thought to give a more pleasing effect to the eye – this is know as ‘bottom weighting’
Some people like to use something called the ‘Golden Ratio’ to work out the most desirable area for the mount, in relation to the artwork being framed. The golden ratio is based on the Fibonacci sequence, and proposes a ratio of 1.64 as the most pleasing relationship between the two.
The golden ratio gives pleasing proportions, although personally I’m not convinced that a mount width calculated to a ratio of 1.64 is always optimum. I’m actually very fond of using an extra wide mount for a small drawing or painting, and wide mounts are often employed by museums and galleries to give a small work more prominence. Your framer will likely just use his or her eye to judge the most pleasing mount width to go with your artwork.
The relationship between frame size and mount size
A golden rule is said to be that the frame and mount should never be the same width. I personally also think that the mount should always be wider than the frame. I also feel that with a fairly slim frame, a wide mount looks much more elegant than a meaner one.
CHOOSING A FRAME
The only hard and fast rule about choosing the style of the frame for a drawing is that traditionally, drawings are very rarely framed with extremely ornate frames. Even in an art gallery or museum the fanciest golden frames with cast plaster mouldings are reserved for oil paintings whilst drawings are framed more simply, because they are usually smaller and delicate. Very ornate mouldings would overwhelm and dwarf them and the scale would feel wrong. Flat and fairly plain timber or gilded frames work well for drawings.
For watercolour paintings more ornate frames may be employed for larger works, but for a small watercolour I’d advise sticking to a simpler frame and avoiding very heavy, gilded ornamentation.
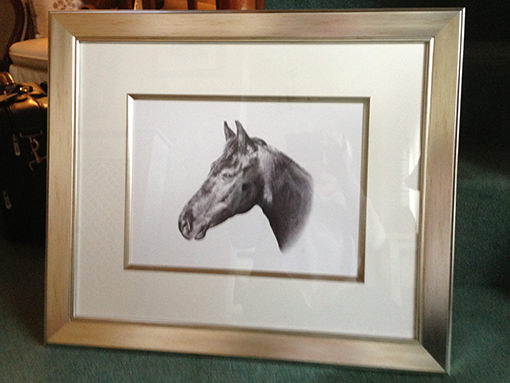
As a general rule of thumb I feel that a drawing pairs best with a frame of a similar vintage. If you’re framing an older drawing or painting then a more decorative and old fashioned moulding can work well. If you are framing a modern artwork then a simpler more contemporary frame may suit it better. However you’ll also probably want to choose a frame that’s in keeping with the style of décor of your home, whether traditionally furnished or in a more modern style.
In colour terms, timber finishes are neutral and should match well with any drawing or painting. When it comes to gilded frames, I generally prefer a silver or pewter frame for a pencil drawing because it echoes the silvery graphite, although I also think a golden frame paired with a more warmly coloured mount such as a heather colour can work.
Slip frames
Above we’ve already discussed the ‘mount slip’, which can be used to finish the edge of the mount’s aperture. Another type of slip moulding is often used to add extra width to the frame itself, by running it around the inner edge of a frame where it ‘slips’ under the rebate. When a frame has a slip moulding added to this edge is known as a a ‘slip frame’.
A slip frame introduces extra interest and a bit of detail to an otherwise simple frame, and it is commonly used to add a bit of gilding to a frame of plain timber. On the frame in the picture below a silver frame slip and a matching mount slip have been used in conjunction.
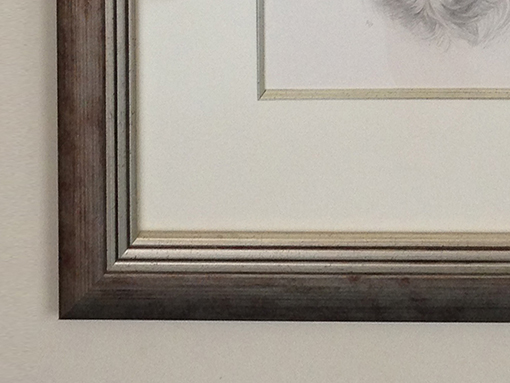
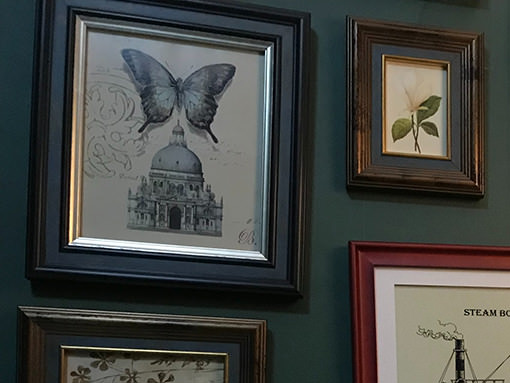
Some very elaborate frames may have fancy slip mouldings that are more like a second, inner frame than a simple trim. These pictures below are framed with large slips and the one on the left has a double slip.
How to pair a frame with a mount
To avoid overkill, I wouldn’t pair a more ornate, moulded frame with a very elaborately layered mount. If you’re using stepping and ‘v’ grooves or gilded filets and slips around your mount aperture, then these effects will look much nicer paired with a simpler frame moulding.
Contrast is important between frame and mount colour. I’m not keen on a very dark frame (plain timber or black) paired with a very dark mount such as a bottle green or navy. A dark frame looks smarter when contrasted with a lighter coloured mount, whilst a very deeply toned mount is better set off by a bright metallic frame.
CHOOSING YOUR GLAZING
Here are lots of different types of framing glass available. Depending on the manufacturer, any brand of glass may offer various different attributes. I would certainly recommend choosing anti-reflection glass when framing any artwork. If you are framing a monochrome drawing then UV protection isn’t terribly important as mediums like graphite pencil and charcoal are not fugitive and shouldn’t fade. However when framing a watercolour I would absolutely suggest requesting glass with UV-blocking.
FLOAT GLASS (budget):
The cheapest, standard type of framing glass. It has a slightly greenish hue due to iron impurities in the glass, or to iron oxide additives.
‘WHITE WATER’ GLASS:
This is glass that is completely colourless and clear, due either to a reduced iron content or to the addition of something like manganese to offset the green tinge of float glass. Like float glass, white water glass has no anti-reflection or UV-blocking.
UV-BLOCKING/ CONSERVATION GLASS (OR ACRYLIC):
To qualify as a true conservation standard a glass should deflect 99% of UV. Some products may offer a lesser degree of UV-blocking: anything between 40% and 95% reflection. Glass or acrylic that blocks 99% of UV can have a slightly yellow tinge depending on the brand, because of the way it filters out a bit of the blue/violet light from the spectrum. UV-blocking glass may or may not also have anti-reflective treatments added to it.
ANTI-REFLECTION GLASS (OR ACRYLIC):
This type of glass is given a special coating that diffuses light as it passes through it. The percentage of reduced reflectivity may vary between different products. It may or may not also be offered with UV-blocking.
ANTI-GLARE GLASS (OR ACRYLIC):
‘Anti-glare’ is cheaper than ‘anti-reflection’ glass and is not coated but instead etched in order to scatter and diffuse light. It’s not as crystal clear as anti-reflection glass and I don’t recommend it.
MUSEUM GLASS:
This will offer both 99% UV deflection and an almost completely anti-reflective surface.
About acrylic glazing
Lightweight and safe, acrylic glazing is something you might consider for a very large artwork. However since it’s unusual for drawings or watercolours to be made on this scale the advantages of acrylic glazing are limited for them. For large prints acrylic might be a good option but it is naturally more reflective than glass which is why I’d never advise buying basic acrylic glazing that isn’t also ‘anti-reflective’.
The disadvantage to cheap acrylic of the type used by online framing companies is the way it attracts dust like mad. If you order an acrylic frame from a framer on the internet it will come with a plastic sheet stuck to the glass which you peel off yourself before inserting the artwork behind it. However once you remove the plastic the static charge will attract a layer of dust to the acrylic which is hard to remove.
In contrast if you get an artwork framed with acrylic glazing in a good framing shop, your framer can use anti-static acrylic sheet and should also have anti-static tools to remove any dust before sealing up the frame.
WHERE TO HANG YOUR DRAWING
As well as framing your artwork with a conservation mount and considering UV-deflecting glass for a watercolour, it’s really important that you choose a suitable hanging position that will minimise exposure to damaging environmental conditions. Here are some key tips:
Before taking your artwork to a framer, touch it only with very clean hands. Try to handle it as little as possible to avoid contaminating it with the natural oils and acids that exist in our skin. I supply my portraits in acid-free cellophane sleeves to protect them before they reach the framing shop.
It’s never a good idea to hang an artwork made on paper in direct sunlight. For watercolour paintings in particular, I’d advise choosing a spot that is always shaded even if you’ve chosen a museum-grade mount and UV deflecting glass, because the latter doesn’t filter out all of the visible light spectrum – just the bit that does the most damage. Paper should anyway be kept in a place that avoids fluctuations in heat which may cause warping or buckling. With this in mind, avoid hanging your artwork near to a source of heat such as a radiator, fire or cooker.
Most of all, remember that damp really is the enemy of paper! I’ve unfortunately had customers whose drawings have been ruined by mildew caused by hanging them on a particularly cold external wall. Internal walls are better, but if you do choose an external wall make sure you have a moisture barrier added between the back mount and the backboard.
Make sure not to hang your drawing on a damp or newly plastered wall and I personally wouldn’t hang any original artwork in a bathroom or in a kitchen. If you are storing a drawing that you don’t currently want to display, don’t keep it in a garage, attic or shed even temporarily.

